Monday, May 22, 2017

Remembrance Jar

image_thumb4

What you will need:

  • Mason Jar
  • Glue
  • Patriotic Confetti

How to:

Have the children paint the jar with glue in sections.

Once they have a section painted with glue have them stick on confetti or roll the jar in confetti

When the jar is covered in confetti go ahead and have the children go back over the confetti with glue coating it to finish the jar off. This step saves the jar from losing confetti. 

Children can use this jar to hold pencils at their desk or gift it to their parents, who can light a tealight candle for the fallen heros on Memorial day.

Tuesday, May 16, 2017

Patriotic Handprint!


clip_image002[4]

what you will need:

Grab your blue paper and set it on the table vertically

Follow these steps on painting the child’s hand:

1. Base of the palm will have the blue square opposite of the thumb

2. Using the red and white paint, draw thick stripes

Once the child’s hand has been painted, press Childs hand onto the construction paper,

Have the child rinse his or her hand off.

Once the handprint dries, use the white paint to draw a star on the blue square.

What a fun craft for kids on Memorial day!

Monday, May 15, 2017

Popsicle Stick Uncle Sam

image_thumb1

What you will need:

First glue 6 popsicle sticks together side by side and one horizontally across the middle of the vertical sticks.

Under the horizontal popsicle stick, glue two wiggle eyes.

You can draw a nose with a marker or we used a hole punch of pink paper.

Next, Trace the children’s hands on white construction paper, cut those out. Glue the handprints right under the nose and eyes.

Once this is all dry have the children alternate between red and white paint or markers to color Uncle Sam’s hat and on the horizontal stick color it blue.

This craft was approved by Uncle Sam himself!

Thursday, May 11, 2017

Mom’s my sunshine craft!


image_thumb51_thumb[5]image_thumb[2]

You are my sunshine my only sunshine, please don’t take my sunshine away!

Items needed:

Let each child grab their mothers favorite color out of your construction paper selection. This will be for the base of the craft.

You will then paint the child’s hand with Yellow paint and press it to the middle of the construction paper. This will create the letter ”O” in the word Mom.

Next have the children add the stickers or cut outs of the letter M’s to both sides of the handprint.

Then you will want to help the children write out the phrase:  "You are my sunshine", under the hand print.

Let the children decorate the paper and hand print with hearts and flowers, either letting them paint the designs or letting them use stickers depending on their age range.

Let it all dry and Give to Mom on Sunday, May 14th.

Wednesday, May 10, 2017

Roaring Mother's Day Craft

image
Let’s tell Mom how cool she is! We should send her some roaring love!
Supplies needed:
Instructions:
Teacher prep work:
Teachers go ahead and get a cardboard box from home or school.
Cut a flower shape out to be the face and mane of the lion.
Once you have the cardboard cut, use a paint brush and orange finger-paint to paint a circle and two cat ears. Once dry, go ahead and draw the face of the lion or save this step for the children to draw later.
Kids Time to jump in:
Each kid should get a white sheet of paper to start the craft.
Paint the childs hand with orange finger-paint and press it to the paper. Let the children go wash their hands off and let their handprint dry.
Once dry, glue the Lions head a little bit above the pinky finger. (See picture above for reference)
With the brown marker, help the child make toes on the tips of the fingers ( just two to three lines will do).
Then have them draw a tip of the tail with the brown marker as well.
If you didn’t already draw the face on the cardboard have the children create a face with the black marker.
Last, but not least, the most important part of this craft is the special message to Mom.
Mom Rawr the Best!


Tuesday, May 9, 2017

Memorial Day 2017 Craft

 
clip_image002
What you will need:
This is a really simple craft for kids to do.
Have a photo of a flag printed out or display a flag for your kiddos to look at.
Have each child  duplicate the image of the flag using the different colored buttons, onto the blue construction paper.
Have them use blue and white buttons for the stars, and different color reds and whites to complete the stripes of the Flag.
Make sure your students use a decent amount of glue to keep the buttons on the paper.
This is a Keepsake that can be displayed at home year round!


Monday, May 8, 2017

Flower Pot of Love for Mother’s Day


image_thumb

What you will need:


Instructions:

On the brown sheet of paper, using a pencil trace the shape of a flower pot. Once traced, cut the traced flower pot out.

You can write a special note to mom on the flower pot

ex:

  • Thanks for watching me grow!
  • You are the best Mom ever!
  • Happy Mother’s Day!

Have your white sheet of paper ready for the next step.

Paint the child’s hand green, add yellow to the tip of the fingers. Place that hand on the paper and press gently. Have the children wash that paint off, then they can pick their favorite colors and dip their fingers in to create the petals that go around the yellow circle at the tip of their hand print. 5 to 6 petals are best!

 Don’t hesitate to turn this into a counting craft for the little ones.

Once the paint has dried up glue the pot on top towards the bottom of the hand print.

Now those are some flowers to last mom a lifetime!

Thursday, May 4, 2017

Mother’s Day Mason Jar


image_thumb


What would we do without moms? Aren’t they the greatest gifts on Earth!  Well, it’s that time to start thinking of fun thoughtful gifts to create to give to mom on her big day May 14!

Supplies needed:

Instructions:

Grab your blue construction paper and trace a mason jar on the paper. Then go ahead and cut it out.

Once the shape of the mason jar has been cut out, using a black marker you can trace the outside of the jar as well as create the lines that a lid would screw onto.

Next grab your yellow ribbon and create a bow. Depending on what type of ribbon you have you can hot glue it on or you can find a premade bow that just stick on.

Grab a yellow piece of construction paper and cut out an oval shape to be glued on to the bottom of the jar, later the children will add a personalized message to their Mom.

Paint the children’s finger and have them decorate the inside of the mason jar creating the light that the lightening bugs give off.

Once the paint has dried take the black marker and depending on the age of the child, have them make a bug shape in the center of the fingerprint and if they are too young to do this step go ahead and draw the bugs yourself.

Next it’s time to help them write the personalized message to their mom (we have two options to choose from)

  1. Mom, you light up my life!
  2. Mom, You light up my world!


Just like that you have a super cute keepsake to remind Mom how important she is to you!

Tuesday, April 4, 2017

Carrot prints

image

What you will need:

Take the green paper and cut it into skinny slices this will represent the carrot stem

Grab a full size sheet of white paper. Paint the childs foot orange and stamp it on the paper, you should have enough room to get both feet on one piece of paper. If not use another piece of white paper to do this same step with the other foot.

Cut alongside the foot print leaving a slim edge outlining the foot print.

Next tape the green slices to the backside of the foot print

Now isn’t that one cute carrot any mom and dad would like to cherish !!

Monday, April 3, 2017

Easter Egg Word Work Center

imageimageimageimage

What you will need:

  • Plastic Easter eggs
  • Print out: work sheets and word photos along with their corresponding letters
  • Scissors
  • Colored pencils

Directions for teachers: Cut out all the letters and photos, put the corresponding letters to the photo word in the eggs and close them up for the children to use.

Directions for kids:

Before opening each egg, children can try to guess what word is inside the egg.

Once the contents spill out, have the children arrange the letter tiles to make the picture shown on the card.

Then write the words on the response sheet.

Once completed, have the children color the pictures.

Learning to spell out words has never been so much fun!

Click on the link below to download your complete, FREE copy of the activity!https://www.teacherspayteachers.com/Product/Easter-Egg-CVC-Literacy-Center-FREE-1767191

Thursday, March 23, 2017

Stain Glass Cross


Tutorial for Stain Glass Cross Window DecorationTutorial for Stain Glass Cross Window Decoration

Tutorial for Stain Glass Cross Window DecorationTutorial for Stain Glass Cross Window Decoration


Items needed:


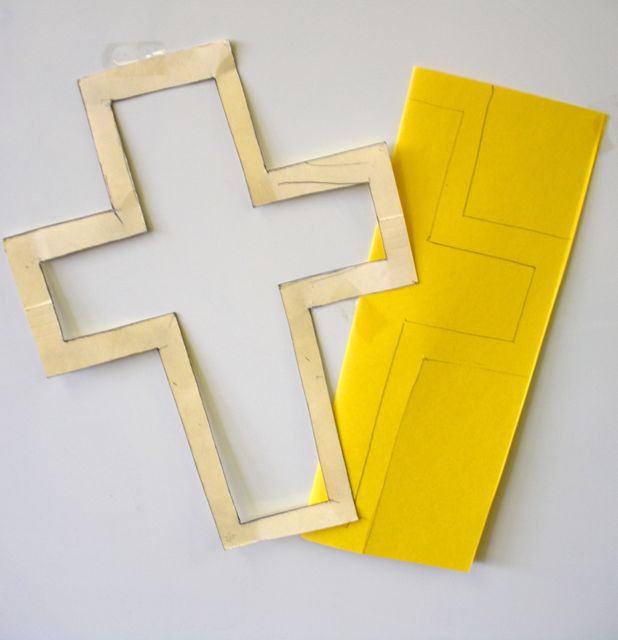
  • Old file folder (to create a cross template)

  • 1 sheet of construction paper in a bright color per student

  • 2 sheets of contact paper per student

  • Tissue paper squares in bright colors (1” to 2″ in size)

  • Scissors

  • Permanent marker


  1. Make a Template: use a file folder to create a cross template. Fold the folder in half, draw half of  a cross, cut out, leave a 3/4”wide border.

  2. Trace:  Folding the pieces of construction paper in half, Trace 1/2 the cross onto the paper. Make sure you are tracing along the fold so the cross will stay connected when it is cut out. You will need to keep the paper folded in half to cut out the cross.

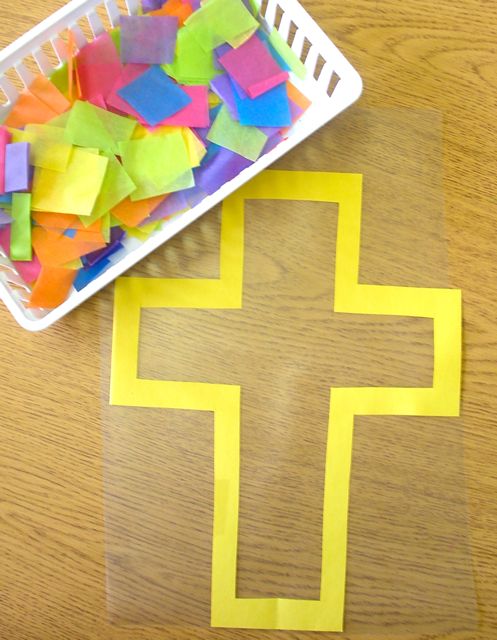
  3. Frame: Peel the contact paper and place it sticky side up on the table. Center the cross on the contact paper for your students.
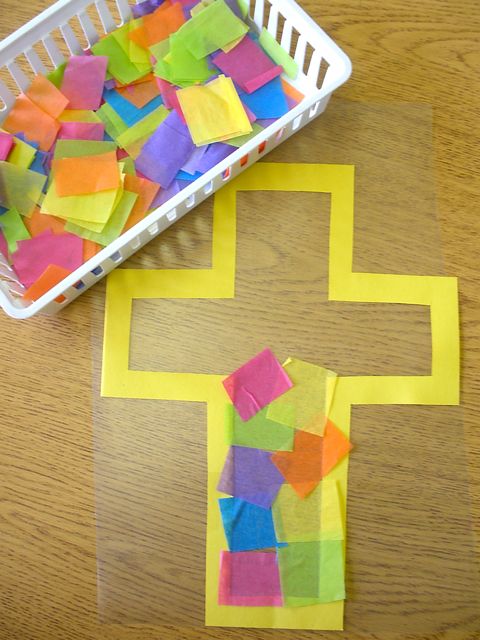
  4. Decorate: Let students fill in the cross with the tissue paper squares.
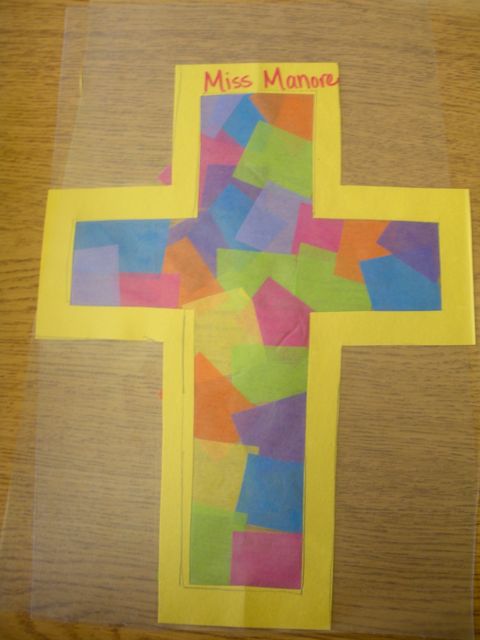
  5. Cover: Use the 2nd sheet of contact paper to seal the cross together. Place the new sheet of contact paper sticky side up, then flip the cross page onto it.

  6. Label: Use a sharpie to label the front side of the cross with the student’s name. (the back side has tissue paper overlapping the frame)
  7. Trim: Use scissors to cut excess contact paper from edges.


Enjoy your stain glass crosses!

Tuesday, March 21, 2017

Easter Egg with Cross


image_thumbimage_thumb1

Items needed:


1. Cut a cross, heart, and circle out of colored paper and glue to a 9” paper plate.

2. Cut an egg shape out of pastel colored Construction paper.

3. Use Q-tips to paint rows of design onto the egg shape, or use small stamps.

4. Glue the egg to a second 9” paper plate.

5. Cut the paper plate with the egg shape in half.

6. Fasten the two halves to the cross plate with 2 brads.

Monday, March 20, 2017

Footprint Bunny


image_thumb11

What you will need:

  1. Paint 2 paper plates each: 1- 9” & 1- 6”
  2. Make 4 footprints per child and cut them out when they dry.
  3. On 2 footprints paint a odd-shaped oval. These will be the ears. On the remaining footprints, paint a white oval & 3 circles to resemble a bunny’s foot.
  4. Tape or glue 2 of the footprints as ears and 2 as feet.
  5. Make the facial features by painting or drawing on eyes, a nose, a mouth.
  6. Use pipe cleaners for the whiskers and glue them on next to the nose of the bunny

Friday, March 17, 2017

Classroom St. Patrick’s Day Scavenger Hunt


Whether you do it the first thing in the morning or while they are at lunch, it’s always a fun treat to do a scavenger hunt with the entire class. We have some clues to print off and hide around your classroom.

Don’t forget to fill your pot of gold at the end of the hunt with some great goodies! Here’s some tips on what loot the classroom leprechaun can leave behind: Get out of Homework passes (good for 1 homework assignment), Candy is always a favorite (gold coins, yellow starbursts, etc), Pencils with shamrocks on them, Shamrock stickers and the list can go on. Just make sure there is plenty to go around.

We hope your class has an amazing time searching for the pot of gold the Leprechaun left behind!

Happy Hunting!!


image


imageimage

imageimageimageimage

Clues made by Landeelu.com

Wednesday, March 15, 2017

Funny Face Grass Experiment


image

This fun and engaging science experiment will help your kids learn about the needs of a plant and allow them to observe changes over time. Your kids will love growing grass in the classroom with only a few basic materials:

How to Grow Grass:

Have the children take a funny face picture to put on the outside of their cups. Print the photo off and have the children tape the photos onto the cup.

Have the kids fill their cups 3/4 of the way to the top with potting soil. Use a small toy shovel or measuring cup.

Next, have the children sprinkle grass seed on top of the dirt. Planting grass seed is not an exact science; there are no specific measurements . The more seeds that are sprinkled on top of the dirt, the more grass will grow.

After the seeds have been sprinkled on top of the dirt, have the children water the soil. We suggest to use spray bottles, kids are less likely to over water their plants with the spray bottle.

Then, place the cups in a sunny location such as on a windowsill or near a window where they will receive sunlight. Remind your kids to water their plants each day to keep the potting soil moist.


Watching Grass Grow :


If cared for properly, your grass seeds may begin to grow in about one to two weeks depending on where you live. Continue to water the cups daily, even after the seeds begin to sprout.

Ask children to observe their cups daily and record their observations in a journal, so they can track growth over time.

When the grass is tall enough, have the children give their grass a crazy hair cut with scissors.