Showing posts with label crafting for easter. Show all posts

Thursday, April 14, 2022

Something To Think About This Easter


Have you ever wondered where the Easter bunny came from?

Back in the 1700s, Germans emigrated to America and settled in Pennsylvania. They started telling their neighbors the story of a special bunny that came each spring to lay beautiful colored eggs.

Children began building nests to collect the eggs. They also set out carrots in case the Easter Bunny got tired hopping from nest to nest.

Eventually, the eggs turned to chocolate, the nests became baskets, and people started giving gifts to each other.

How did Bunnies and Eggs Get Associated with Easter?

Spring is when flowers burst forth with color and chase away the brown, barren landscape of winter.

Animals like deer, raccoons, skunks, otter, birds, and yes – bunnies – have babies in the spring.

Eggs are a symbol of new life.  Colored eggs point to the festive colors of spring.

Spring is a new start, a new beginning. Why not celebrate that? 

A Question to Ponder

What if everything you did wrong was forgiven and forgotten?

How would you feel?

What would you do?

How would you live?

Forgiveness is a relief when someone grants it. It’s like having your slate wiped clean and your bad behavior removed from your permanent record.

Ask your students these questions. Maybe they have someone they can forgive. Or maybe they can apologize to someone they’ve offended.

It might be a new beginning for one (or more) of their relationships! What better way to remember Easter?

Give Someone a Basket

Who doesn’t love a gift?

Help your students show someone they care with an Easter basket filled with gifts. It can be as simple as filling a few eggs with candy. Maybe they can make a card to put inside. Whatever they do, it will be beautiful – and appreciated.

Bonus points if you give baskets to people who might not get one otherwise.

Thank you for reading. At Pure Fun, we’re committed to helping you help your preschool students thrive all year long. Happy Easter to you and yours!


Tuesday, April 4, 2017

Carrot prints

image

What you will need:

Take the green paper and cut it into skinny slices this will represent the carrot stem

Grab a full size sheet of white paper. Paint the childs foot orange and stamp it on the paper, you should have enough room to get both feet on one piece of paper. If not use another piece of white paper to do this same step with the other foot.

Cut alongside the foot print leaving a slim edge outlining the foot print.

Next tape the green slices to the backside of the foot print

Now isn’t that one cute carrot any mom and dad would like to cherish !!

Thursday, March 23, 2017

Stain Glass Cross


Tutorial for Stain Glass Cross Window DecorationTutorial for Stain Glass Cross Window Decoration

Tutorial for Stain Glass Cross Window DecorationTutorial for Stain Glass Cross Window Decoration


Items needed:


  • Old file folder (to create a cross template)

  • 1 sheet of construction paper in a bright color per student

  • 2 sheets of contact paper per student

  • Tissue paper squares in bright colors (1” to 2″ in size)

  • Scissors

  • Permanent marker


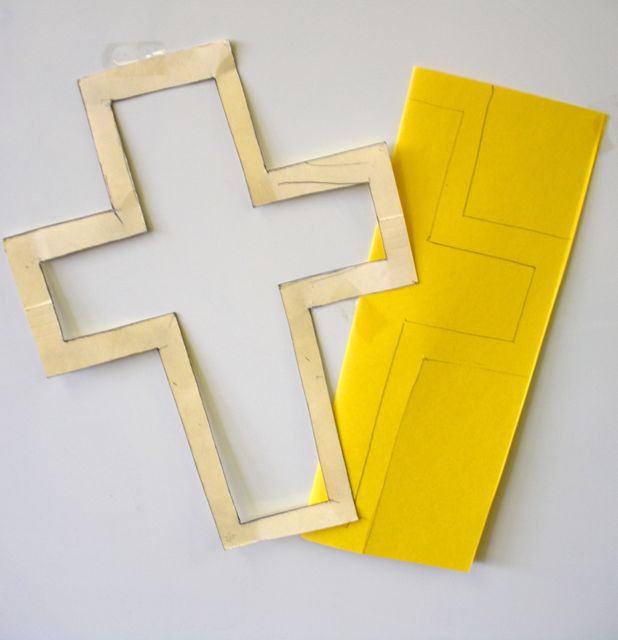
  1. Make a Template: use a file folder to create a cross template. Fold the folder in half, draw half of  a cross, cut out, leave a 3/4”wide border.

  2. Trace:  Folding the pieces of construction paper in half, Trace 1/2 the cross onto the paper. Make sure you are tracing along the fold so the cross will stay connected when it is cut out. You will need to keep the paper folded in half to cut out the cross.

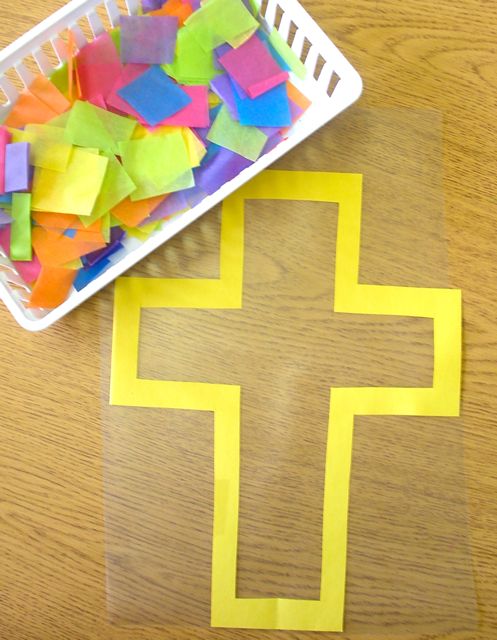
  3. Frame: Peel the contact paper and place it sticky side up on the table. Center the cross on the contact paper for your students.
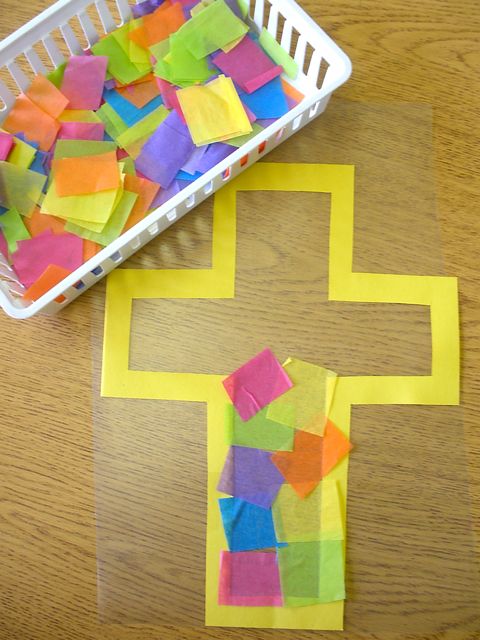
  4. Decorate: Let students fill in the cross with the tissue paper squares.
  5. Cover: Use the 2nd sheet of contact paper to seal the cross together. Place the new sheet of contact paper sticky side up, then flip the cross page onto it.

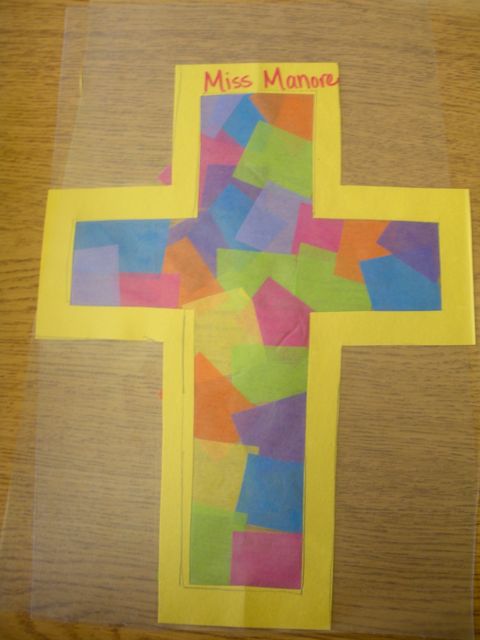
  6. Label: Use a sharpie to label the front side of the cross with the student’s name. (the back side has tissue paper overlapping the frame)
  7. Trim: Use scissors to cut excess contact paper from edges.


Enjoy your stain glass crosses!

Monday, March 14, 2016

Eggcellent Easter Crafts - Marbled Eggs

This “eggcellent” Easter craft is a must try for every school, daycare or childcare center! The craft is simple and fun to create. It will leave you with a finsihed product that others wont believe your little ones made by themselves.

Items needed: tray or large plate, card stock or construction paper cut into Easter egg shapes, acrylic paint, craft stick or tooth pick and a squeegee


clip_image00110_thumb

Begin by cutting out your easter eggs from cardstock or construction paper. Have your students do this part for some cutting practice! You can always draw out the eggs on the paper to give them some cutting guidelines.

To start the marbling process, fill your tray or plate with shaving cream. You will want an even layer across the surface. Next, you can take your acrylic paint and add a few drops around the shaving cream of as many colors as you would like.

After adding your drops, take a craft stick or tooth pick and drag it through the paint drops in zig-zag motions. This will create the marbled effect on the eggs.

Next, take your card stock or construction paper egg and lay it down on top of the shaving cream design. Let this sit for a few seconds to soak in the colors.

Pull the egg up off the shaving cream and allow it to sit another few seconds. You can then take your squeegee and wipe the shaving cream off. Sit the paper to the side and allow it to dry.

This technique can be used on all kinds of shapes for different projects and holidays!