Thursday, December 31, 2015

Outdoor Activites for Cold Weather

Hot Chocolate Stand – It’s the winter version of a lemonade stand! Have the kids help set up the stand and prepare the hot chocolate. This is a great way to teach children about money and other aspects of business. Then you can pick a charity of your choice to give the proceeds to!


Smores – A must have for winter weather, smores are the perfect treat for all ages! Set up a smores station and allow the kids to help make their own. If having an actual fire is too much of a hassle, try using a marshmallow fluff or putting the smores in the microwave. No matter which option you choose, these are guaranteed to be a delicious treat!


Bubbles – Most people think of bubbles for summer time fun, but they are actually perfect for cold weather too! When the weather drops down to below freezing, have your little ones bundle up and take them out with a set of bubbles. The bubbles will freeze in the cold air!


For more cold weather fun. meet us back here! We have lots of fun ideas to share with you in the new year!

Thursday, December 17, 2015

Christmas Cookies

 This adorable melting snowman is the perfect cookie for a delicious treat and a good laugh. With the cookie of your choice, take some white frosting and spread it across the top. You can also try melting the icing in the microwave and pouring it onto the cookie. This will give the illusion that your snowman is melting. Next, add on a marshmallow to be the snowman’s head. Lastly, add on your snowman’s features with icing or food pens.

Reindeer Cookies are just as simple to make! Again, using the cookie of your choice, create your base. You will want your cookies to have a bit of an oval shape so you may need to have a cookie cutter handy. While the cookies are still a bit warm, add on two pretzels for the antlers and three m&ms for the eyes and nose. This is a great one for the kids to help with decorating! If you have trouble getting the features to stick, try using a bit of icing to hold things in place!

PureFUN! Supply wishes you a very Merry Christmas and Happy New Year! Meet us back here for our first blogs of 2016! 

Thursday, December 10, 2015

Holiday Craft and Gifts Ideas – Holiday Handprints

Handprint Crafts are the perfect choice for all ages in your school, daycare or childcare center! With a little help from a teacher or parent, students can easily recreate these handprint crafts and use them as gifts for the holiday season. Add the following designs onto T-shirts, cards, ornaments and more!

Five little fingers create the perfect five little snowmen! Paint the entire palm of the hand along with the inner side of the fingers white and stamp down firmly to create the base. Finish off the snowmen by painting on their features and whatever accessories you would like them to have.

This adorable Santa handprint is easy to recreate. Start by stamping your handprint onto the top half of your page. Once you have made your handprint, flip the paper around so that the top is now the bottom and your handprint resembles Santa’s beard. (Fingers should point downward.) Next add on Santa’s facial features and of course his hat! Each of these can be painted on. To keep it easy for little ones, give them a circular paint sponge and let them stamp on the features. Lastly, add on a set of wiggle eyes!


Let’s not forget about the Reindeer that pull Santa’s sleigh! Have students make their handprint with their fingers spread apart. The fingers should be pointed downward with the palm towards the top of the base they are printing on. Finish off your reindeer with a set of hooves on the tips of each finger, a red nose on the tip of the thumb, a small tail opposite the thumb, reindeer antlers and an eye.

Thursday, December 3, 2015

Holiday Crafts & Gift Ideas – Reindeer Prints

This Holiday crafted gift idea is sure to leave a print on the hearts of the ones who receive it! With just a few fingerprints you can create an adorable holiday card, bag, hat and more! All you need is brown finger paint or a brown stamp pad, red paint or a red marker, and a black thin tip marker.

clip_image001

Add your fingerprint to whatever white base you will be using. You can add enough prints to represent your family, one for each of Santa’s reindeer, or however many you would like. Try using different fingers to get the different sizes and prints.

Add the antlers, nose and eyes with your thin tip marker once the paint has dried. Lastly, take your red marker or red paint and add on your reindeer’s nose. You can add your favorite holiday greeting, a name or anything else you would like to decorate with underneath to finish things off.

Now you have an adorable gift to give to your loved ones this holiday season! This craft can be modified for all ages in your school or daycare center too!

Be sure to check back in here for more holiday gift ideas, crafts, snacks and more!

Tuesday, November 24, 2015

Thanksgiving Snack Ideas – Turkey Treats


This adorable cupcake makes for a sweet treat for the Thanksgiving holiday! Start with a vanilla iced cupcake. The cake can be whatever flavor you would like. Next add a circle in chocolate icing to create the body of your Turkey.

Tip! Put the icing container into the microwave for 60 seconds and scoop it into a Ziploc bag. Next, cut the corner of the Ziploc bag to create your very own decorating tool. Simply squeeze the icing into a circle and then fill it in.

Next take 5 candy corns and place them with the point towards the middle on the top side of your chocolate circle. For the head, take a yellow M&M and place it on the top center of the chocolate circle. Add a dot of orange icing on top of the M&M to make a beak and finish off by adding two dots for the eyes with a food marker.

Thursday, November 19, 2015

Thanksgiving Snack Ideas – Healthy Treats

Turkey dips are a wonderful choice for adding some healthy options to your thanksgiving food selection. The first option is a ranch dip with a colorful variety of delicious bell peppers. The second gives a similar look using apples and a hummus dip. You could also use a caramel dip if you wanted to sweeten things up and put a healthier option on the desert table.

clip_image001

This tangerine turkey is a bright choice that will have your little ones begging for more. Cut a pear in half and create the feathers with an array of orange and apple slices. Use raisins or dark chocolate for the eyes and a peanut for the beak. Cheese makes for the perfect pair of feet. You can use cheese for the beak too for those with peanut allergies.

The final turkey treat includes the sandwich of your choice cut into the shape of a turkey body. Next, add carrots around for the tail feathers, raisins for the eyes, and a cashew for the beak.  Again, cut some cheese to create the legs and feet. You can even give your Turkey some grass to stand on by cutting up some celery.

Try adding a healthy drink to go along with your snacks with PureFUN! 100% Juice!`

Friday, November 13, 2015

Thanksgiving Crafts - Turkey Prints

Here’s another turkey craft to enjoy with your little ones. You will need finger paint in red, yellow and brown. Start by painting the hand red and stamping it three times with the palms meeting at the bottom to give it a “V” shape. Next add two yellow handprints between the three red ones to add some color to the feathers.

clip_image001

Next, paint the bottom of the foot brown and print it on top of the hand prints with the heel at the top and the toes at the bottom. Lastly, you can add on the beak, snood, feet and some wiggle eyes.

Now you have an adorable Turkey for the Holidays. You can even have students do this onto a t-shirt or a tote bag!

Friday, November 6, 2015

Thanksgiving Snack Ideas – Turkey Pizzas

Image result for pizza that looks like a turkey

It’s pretty rare to have a student who doesn’t enjoy pizza! This snack idea is all about creativity and can be modified to work around allergies, include favorite foods, be a healthy choice or maybe a not so healthy choice. It is all up to you!

Image result for pizza that looks like a turkey      clip_image001

You could even try giving each of the students a personal sized pizza and letting them decorate their own. The different ideas and ingredients used are always a fun surprise at the end! Plus, it’s a super yummy treat for snack or lunch time.

For more Thanksgiving snack ideas and craft ideas too, check back here!

Tuesday, November 3, 2015

Thanksgiving Crafts - Fingerprint Turkey

This fingerprint turkey is the perfect craft for the upcoming Thanksgiving holiday! You will need finger paint in light orange or yellow, orange, red and brown. You will also need a bit of black and white paint as well for the finishing touches.

clip_image001

Lets get started! Begin by dabbing your pointer finger into the light orange or yellow color. Create an arc by printing your finger onto the page about 8-10 times. Next, take the red color and make a smaller arc beneath it using the same technique. Repeat this step once more using the red paint to complete the tail.

If you have gone for the facing forward Turkey, paint your thumb brown and stamp it vertically into the middle to be the body of the turkey. If you have gone for the side view you will want to print your thumb horizontally from the middle and then add a head by printing in brown with your pointer finger vertically.

Don’t forget to add on the finishing touches with eyes, a beak, legs and feet! Now you have an adorable craft for Thanksgiving. Try having your students do this on the front of a blank card. Then have them write to someone they are thankful for and tell them why they are thankful for them.

Monday, October 26, 2015

Halloween Snack Ideas

Need some healthy snack ideas for a Halloween party in your classroom? We have just what you need! The kids will be getting plenty of the sweet stuff on Halloween night so here are a few ideas that will be a filling, healthy choice that still get snacks into the Halloween spirit!

clip_image001

This platter of Ghostly Bananas and Pumpkin Oranges is guaranteed to be scarily delicious! For the ghosts, simply peel your banana and cut it in half. To finish add two dark chocolate chips on for the eyes. You can use a little dab of peanut butter or Nutella to make them stick.

Try placing a dark chocolate chip upside down underneath the eyes for a mouth!

The pumpkin oranges are just as simple! Peel your orange and cut up a stalk of celery into little stems. Add a stem into each pumpkin by pushing it into place. If you have trouble, try using a straw to create a hole at the top first. 

clip_image001[6]

Want to keep the peel on your orange? Just grab a food marker from your local grocery store and draw a Jack-O-Lantern face onto the outside of your orange. Now you have a Jack-O-Lantern Orange that’s ready to eat!

clip_image001[8]


You can use this same technique using a permanent marker on top of a peaches cup! Talk about a quick and festive snack! This Jack in the Cup will be a hit in any classroom of little ones!


clip_image001[1]

Peanut butter crackers are a classic snack time favorite! Turn them into Spider Sandwiches by adding 4 pretzel sticks cut in half to each side. Be sure to put enough peanut butter in the middle to make them stick well! Lastly take a dab of cream cheese and place a raisin on top to create the eyes.

Try getting your students in on the fun and allowing them to help out in creating these adorable snacks!

Thursday, October 22, 2015

2nd Look Book Box

 Book Box 3

This new product is worth a second look! Each box features a collection of previously loved children's books that are looking for a new set of little hands to pick them up for story time! Perfect for preschools, daycare centers and childcares, our book boxes include stories for children ages 5 and below. Each box, measuring 18x12x10'', comes packed full so you are guaranteed to receive a good variety and quantity of children’s books in each box. Due to the various sizes of each book, the quantity per book box will vary between 40 and 60.

bookbox 1

Books come in a mixture of hard covers and soft covers and may include some seasonal or holiday related titles. All books come in fair to like-new condition and can easily be passed on to the next classroom or donated when students are ready for a set of new stories.

Click HERE to get yours today at our introductory price of $29.99!

We also have yearly subscriptions available in both quarterly and monthly arrivals. For more information, click here.

Tuesday, October 20, 2015

Creepy Crafts for Halloween – Q-Tip Skeleton


clip_image001

You will need 21 Q-tips per skeleton. Start by cutting 6 of those Q-tips in half. Next, take a white piece of paper and cut out your skull shape. It should look a bit like an upside down pear when you are finished. Now you can draw on the eye and nose holes and some teeth to make your skeleton’s face.

Using your favorite color construction paper, glue the head onto the top of the page. Now we are ready to start constructing the skeleton. Start by gluing one full Q-tip vertically underneath the head. This will act as the spine. Next, evenly space and glue 6 of the full size Q-tips horizontally across the spine.

Think of the two ends of the top Q-tip as the shoulders and the two ends of the bottom Q-tip as the hips. You will need two full size Q-tips for each arm. Place them in a “V” shape coming from each shoulder. Next we can add on the legs. Take two more full size Q-tips for each side and place them in a zigzag formation coming from the hips.

Lastly, take 5 of the Q-tip halves to create the fingers for each hand. The final two can be glued horizontally on to the end of each leg to be the feet.

Now you have an adorable skeleton that is ready to be hung up for Halloween!

Monday, October 12, 2015

Creepy Crafts for Halloween – 5 Spider Crafts

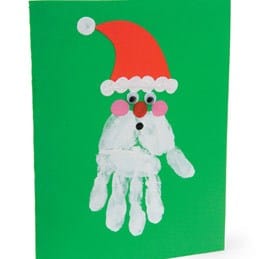
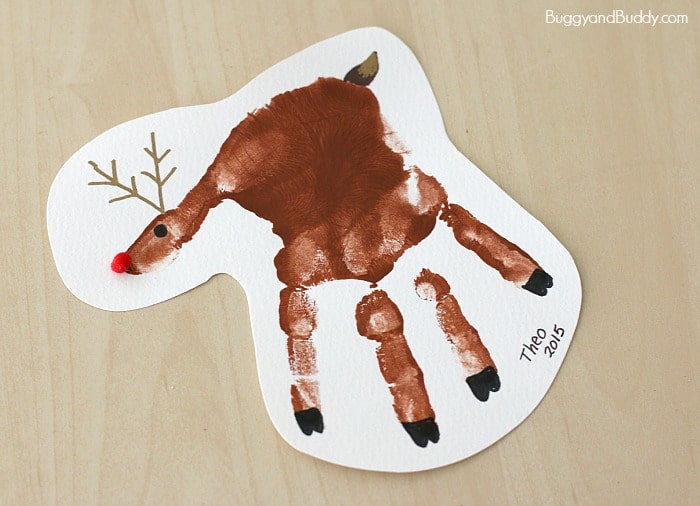
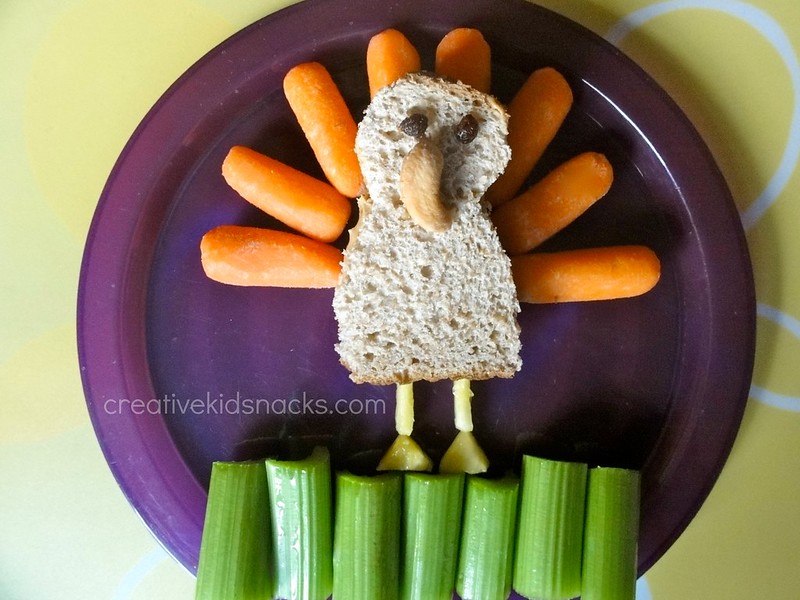
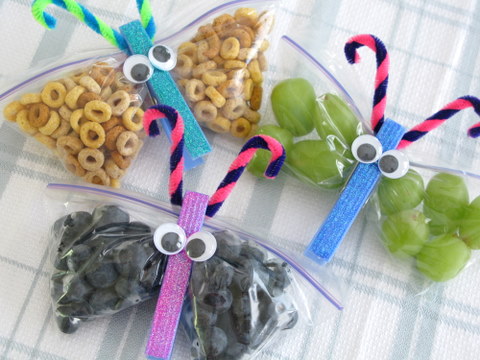
October is here and it’s time to get started on the spooky crafts for the season. In this series we want to share all of our favorite Halloween Craft Ideas for 2015! Let’s start off with 5 Spider Crafts that are crawling with fun!

clip_image001

Spider Candy Bag - Start by cutting 4 chenille stems and your paper plate in half. Next, paint or color your plate black with a marker. When dry, glue the chenille stems around the rounded side of one of the plate halves. Glue the other half of the plate on top of the legs with the two rounded sides on top of each other. Now you can add on the eyes and a smile with construction paper. To make it a bag just add the string on top by hole punching the top corners and tying the string into place. Now you can fill it with your favorite Halloween candy!

clip_image001[6]   clip_image001[8]

Spider Web Plate - Using either a piece of card stock or a paper plate, punch holes around the edge of the circle. Next, give each student a piece of string to weave through the holes and create a web. You can add a handprint spider, as seen in a previous blog post, prior to the web or a plastic spider by gluing it into the web. This craft is perfect for lacing practice!

clip_image001[10]

Craft Stick Spider Web - Create a star shape with 3 craft sticks and glue them together in the center. Next, take a white piece of yarn and begin spinning it around the sticks to create a web. You will need to first secure it in the center and then loop it around each stick as you continue in an outward motion. Add a bit of tack onto the back if you are having trouble getting your string to stay put. Lastly, add in your plastic spider!

clip_image001[12]

Spider Cup – Flip a cup upside down and add on a set of wiggle eyes. Next you will want to take out your scissors and cut out a set of fangs as well as cut 4 chenille stems in half. Take a marker and draw on a mouth. Then you can glue your fangs into place. To secure the pipe cleaners hole punch a hole on each side of the lip of the cup. Thread the stems through and make a knot on the inside with them to keep them in place. Now you can bend the chenille stems as needed to bring your spider cup to life!

clip_image001[14]

Spider Lollipop – This one is perfect for a treat for the whole class or even to hand out on Halloween. You will need 4 chenille stems and a set of wiggle eyes for each lollipop. Just twist the stems form the center around the stick of the lollipop to form the body and legs. You will want to bend the ends of each stem to give the legs a 3D effect. Lastly, glue your wiggle eyes into place.

Tuesday, October 6, 2015

We’re Falling for Leaf Crafts!

Fall is finally here and we are excited to share our Fall craft ideas with you! We all know that this season is known for it’s colorful leaves. In today’s post we will be showing you how to make the most of those leaves that have begun to fall.

image

For starters, Try picking out a leaf and turning it into something silly. This one takes some imagination and creativity. You can draw the rest of your picture with markers and then place the leaves with a bit of glue or tape to create your image.

You can take your creativity to the next level by making your creations fully out of leaves! Check out the fun ideas we found below.

Check back in with us for more Fall and Halloween crafts! We have some fun ideas to share with you throughout the month of October!

Monday, September 28, 2015

Family Tree Craft

We’re back with another craft from our friend Liam. Using handprints and footprints is the perfect way to get the babies in your daycare or childcare center involved in some cute crafting. This handprint tree is a great example of that!

image

For this craft, start by cutting a tree trunk out of brown construction paper and apples out of red construction paper. You will want to cut enough apples to represent each student’s family.

You can then start creating your tree by gluing your trunk into place. Next, paint one of your student’s hands green and stamp it around the top of the trunk to create the look of full branches.

While you are waiting for the paint to dry, write the names of the student and their family members onto the apples. When dry, you can glue each apple into place.

For older students, allow them to cut out the stumps and apples by themselves or from tracings you have prepared for them. They can also add on the names for their family members!

Tuesday, September 22, 2015

Classroom Management – 5 Ideas for Managing Noise Levels

1. Catch A Bubble – My mom uses this with her preschool students and it works like a charm. She tells them to catch a bubble and they immediately fill their mouths with air. Students will tap their friends who haven't yet caught the memo and point at their mouths to let them know what’s going on. Next thing you know, the class is quiet and everyone has puffy cheeks.

2. Call and Response – The teacher starts by saying “1, 2, 3 eyes on me.” The students will then respond with “1, 2 eyes on you!” You can even come up with your own clever phrases to use. Try using your classes favorite song. The teacher will say or sing the beginning of the first line and students have to finish.

3. Match the Clap Pattern – The teacher will start by clapping a special pattern. When the teacher completes the pattern, the students must then repeat it back. This can go on for a few rounds until you have everyone’s attention.

4. Marble Jar – Place a Jar at the front of your classroom. When students exhibit good behavior, add a marble to the jar. When they behave poorly, remove a marble from their jar. When the jar is full, your class can celebrate by having a pizza or popcorn party! Having a visual in the front of the room is a great way to keep students thinking about good behavior.

5. Whisper Challenge – Start by whispering a direction to the students. For example, “Raise your hand if you can hear me.” Those that hear you will start the reaction by raising their hands. Continue to whisper different actions until you have everyone’s attention. You can even throw in a few rewards as you go such as “the first five people to raise their hand may go to the prize box.”

image

Thursday, September 10, 2015

Classroom Management – Class Countdown

Add some fun to your class schedule by using silly countdowns and timers! These timers are perfect for letting students know their time is almost up on a test or assignment. This will give them a little bit of a heads up too so that they know they need to start wrapping things up.

Timers and countdowns are also great for noise control! When things get a little too rowdy, just put up one of your timers. If the students aren’t quiet by the time it reaches one, you can give them a consequence. This gives them time to correct themselves before being reprimanded. Plus, they will be excited to see which timer you picked.

Check back with us here for more classroom management ideas!

Tuesday, September 1, 2015

Classroom Management – Quiet Critters

Looking for new ways to keep the volume in your classroom down? Check out these Quiet Critters! Quiet Critters only make an appearance when the room is quiet and the students are well behaved. If things get too loud or out of control, they get scared and need to return back home. You will want to have one for each student in the classroom. This way the students that are behaving can have one placed on their desk and the students who are not will change their act to earn their quiet critter too.

All you need to create your critters are heart shaped foam pieces, assorted wiggle eyes, and colorful pom poms. The foam heart acts as the base and looks like little feet. Simply glue the pom pom onto the heart and then add the eyes. We love that the critters pictured above have different eyes. It adds a little fun for the students when they see which one they earned. You can even have them create their own critters and ask them to pull them out when they are well behaved. Give this idea a try and let us know what you and your students think!

Friday, August 28, 2015

Fun Foods – Cafeteria Caterpillars

These little critters are the perfect healthy snack to make in your classroom or even to add to your student’s lunchbox. It only takes a few minutes to create each caterpillar and students can easily get in on the fun.

 caterpillar 2

You will need: wooden skewers, grapes, vanilla frosting and mini chocolate chips.

Start by sliding the grapes onto the skewer one by one. When you have the skewer filled you can add a small dot of vanilla frosting on the end grape. This will act as “glue” for the eyes. Lastly, stick a mini chocolate chip on top of the glue.

caterpillar from grapes

Try adding the book The Very Hungry Caterpillar along with this idea. All you need is a purple grape or baby tomato for the head. That’s a lesson, a craft, and a snack all in one! 

Friday, August 21, 2015

Fun Foods – Butterfly Bags

This adorable butterfly is the perfect way to get your little ones excited about healthy eating this school year! This idea doubles as a craft time activity and is a breeze to create. All you need are clothes pins, wiggle eyes, chenille stems and glue. You can purchase colored clothes pins or have your students decorate them with markers or paint. You will want to make sure each student has 1 clothespin, 2 wiggle eyes and 2 chenille stems.

Start by spinning your chenille stems to give the antennas a colorful, new look. You can then take your glue and place the center of the stems in the grove on the pinching side of the clothes pin. Make sure you press the chenille stem in before closing the pin so that the two sides don’t stick together.

Next, take your wiggle eyes and glue them into place. We especially love the look of the larger ones like the eyes pictured above!

After letting the glue dry, fill up a snack size Ziploc bag with your students favorite healthy snack. You will want to leave enough room for the clothes pin to fit onto the bag without smushing the food. Place your clothespin in the center of your bag and you have a fun little butterfly that’s perfect for lunch time!

Friday, August 14, 2015

Fun Foods – Apple Cars

Looking for a way to encourage your little one to make healthier eating choices? This fun food idea is perfect for you! By adding a little fun to your healthy snack each day, your student will be excited for snack time and trying out the new foods they get to create things with.

This one is simple to create. All you need is an apple, grapes and toothpicks. Start by cutting your apple into slices and the grapes into halves. You will need two grapes per car to give you four tires for each one. Take two tooth picks and push them through the inner side of the apple on the top and bottom to act as the axels for your wheels. Lastly, add the grape wheels onto the toothpicks with the cut side facing outward. Now you have an adorable snack that is good for playing and eating.

Check back here for more back to school ideas and fun foods that are healthy for your little ones!

Friday, August 7, 2015

Back to School – Door Decor

The new school year is quickly approaching and teachers are putting the final touches on their classrooms. We wanted to give you some ideas on how to prepare your classroom to be as welcoming as possible for your new students. Here are a few of our favorite door decorations to spark your imagination!


Adding something fun to your door is a great way to let students know that there is a fun and welcoming environment inside. They are getting a first glimpse of that before even entering the classroom as it almost acts as a welcome mat. This is the perfect place to add all of the names of your students so they feel welcomed individually and can see who else to expect in the classroom when they go inside.

Wednesday, July 29, 2015

Summer Splash – Come Sail Away With Me

Sail away with us into some more water day fun with this summer craft! This craft is a breeze to create and only requires a few items in preparation.

Here are the items you will need to set sail: Sponges, Straws, Foam Craft Sheets and Scissors

Let’s go ahead and take care of all of our cutting duties first. Starting with the sponge, cut a slit on one end about an inch from the edge. Next, grab a piece of your foam sheets and cut out a triangle. Then you will want to cut two slits into the triangle, going horizontally, about the width of your straw. The slits should be parallel to one another.

Now you are ready to assemble all the pieces. Start by taking one end of your straw and threading it through the two slits in the foam triangle. It should go in on the first slit and back out on the second. This creates your sail.

Take your sail and stick the free end of the straw into the slit in your sponge. Now we are ready to set sail!

You will want to have a small kiddie pool or some sort of large bucket for the kids to try out their boats on. You could even hold a boat race to see which boat goes the fastest from one side to the next!

Wednesday, July 22, 2015

Summer Splash – Painting with Water

Looking for an easy activity that is perfect for all ages in your daycare, childcare center or school? Water Painting is the activity for you!


Water painting is an excellent choice for a hot summer day! All you need are a couple bowls of water and some paint brushes. You could use paint sponges as well. Take your group outside to an area where there is plenty of concrete or asphalt canvas. You may want to pick a shady spot if it’s a sunnier day. Let their imaginations go free as they paint up and down the sidewalks or onto the playground area. Image result for painting with water

What is the best part about using water? Water will dry so there is no harm done to clothing and no mess to clean up outside! If you are concerned about the artwork not being a lasting project, bring your camera out and snap a picture of each new creation with the student next to it. Now you have a lasting copy of each piece!